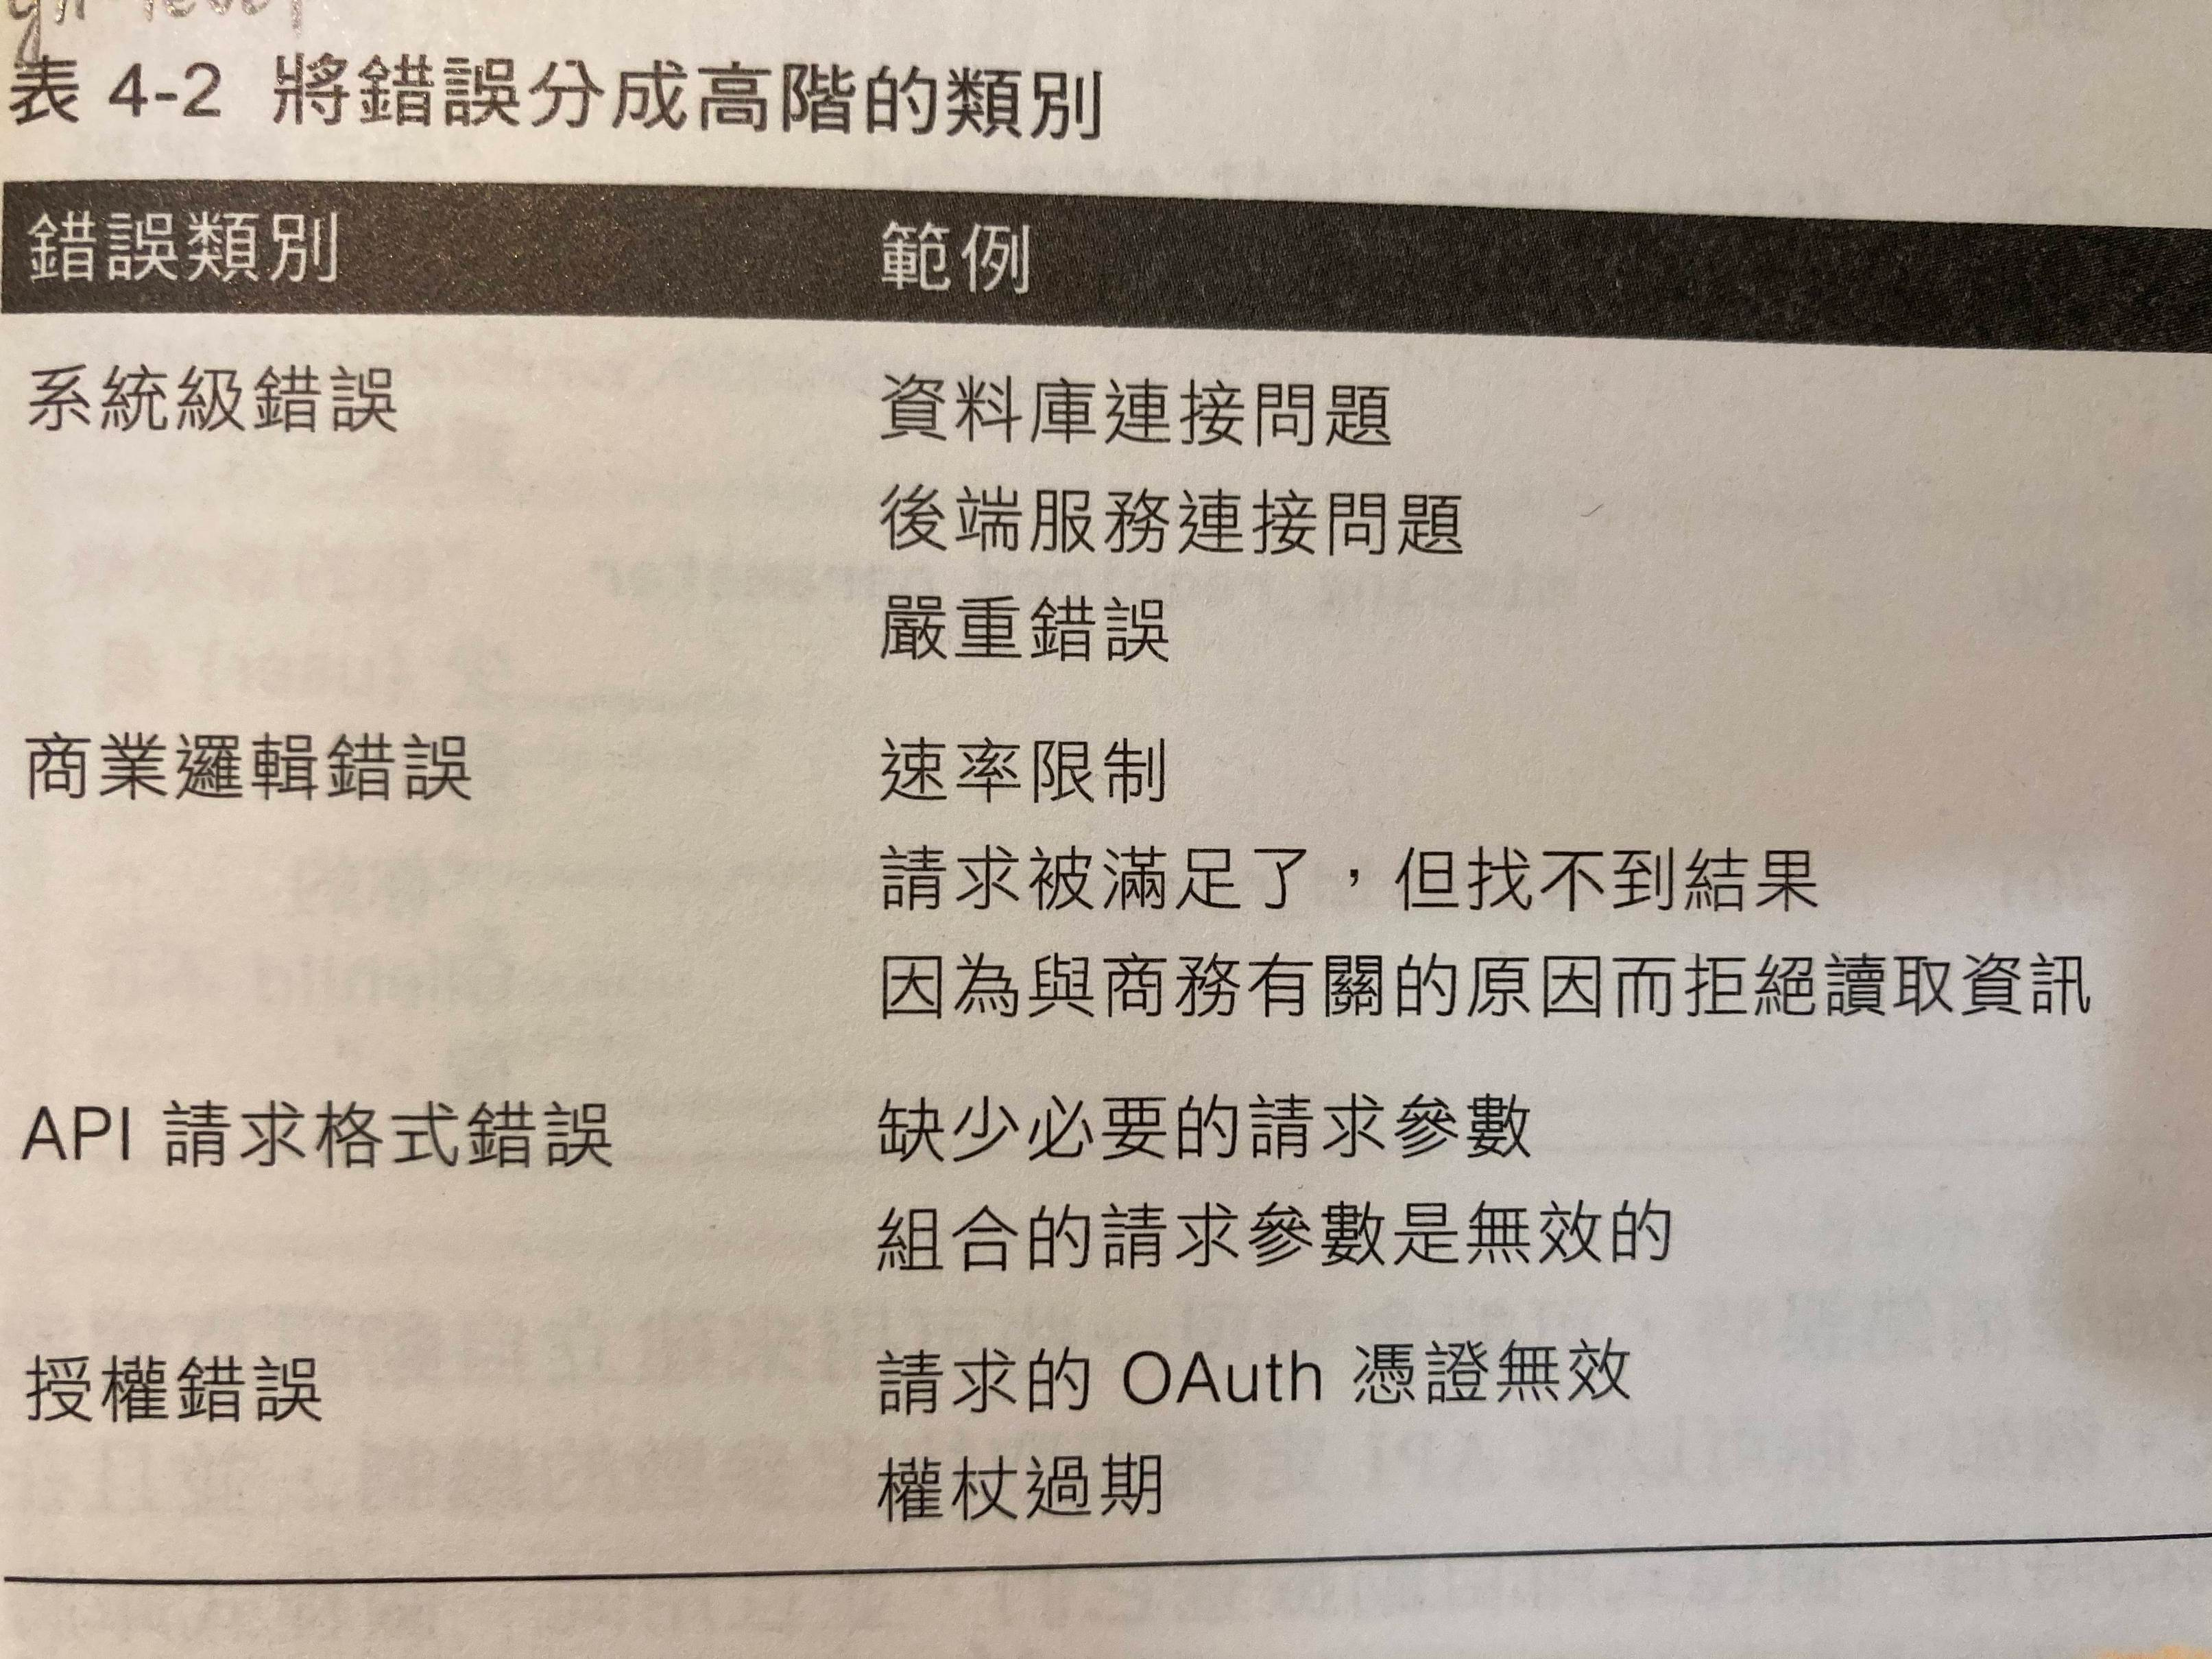
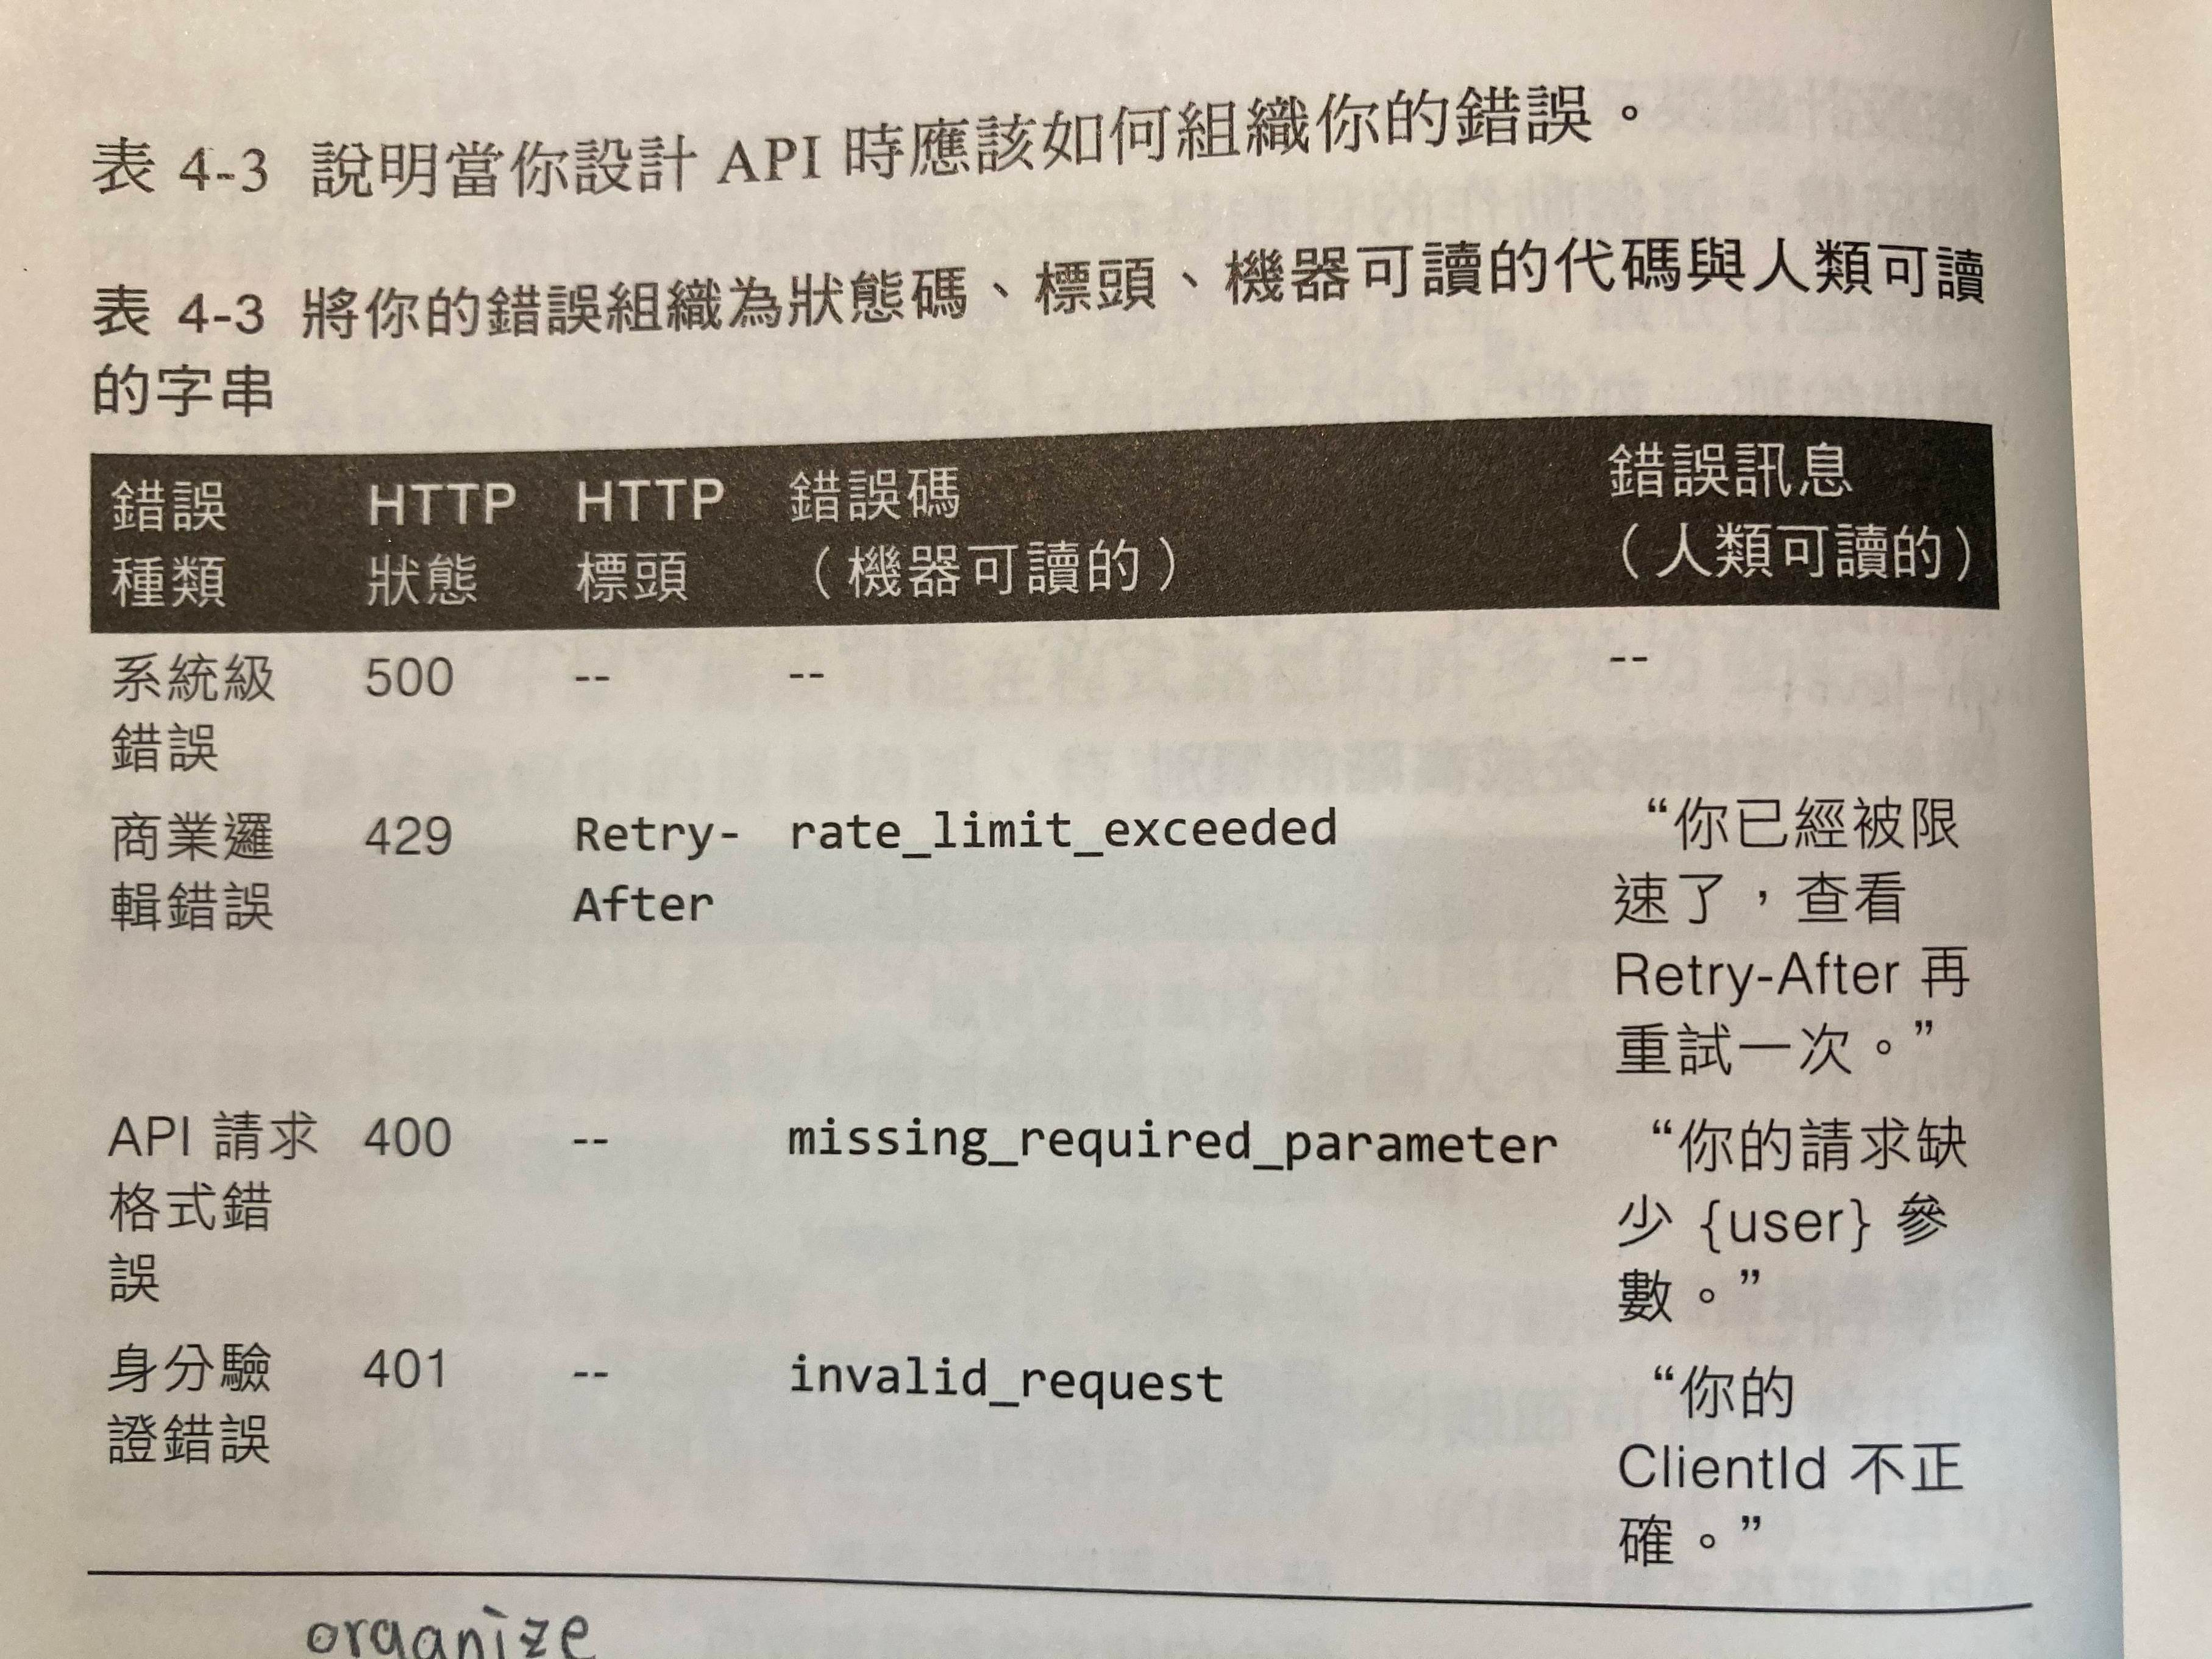
用 Go 寫了個可以讀 Readmoo 的閱讀記錄跟劃線的 package。

可以從閱讀記錄拿到基本的書籍資料跟劃線。

細節見 Github

應該要把拿 token 弄得簡單點,現在很手動…

我的 keymap 是 Sublime + Jetbrains 部份按鍵 + 自己設再配 vim 的大雜燴

  • ctrl + shift + p:執行動作(action)
  • ctrl + p:找檔案
  • ctrl + r:檔案中找 symbol
  • ctrl + alt + shift + t:refactor 選單
  • alt + enter:各種神奇功能(?)
  • alt + insert:加入各種 code
  • shift + f6:rename
  • alt + 1:project browse window
  • alt + 3:find window
  • alt + 4:run window
  • alt + 9:git window

TBC…

Go 從 1.13 開始支援 Go Module,可以在 GOPATH 以外的地方建立 go project 並進行套件管理。一直覺得 source code 只能放在 GOPATH 裡超阿雜…

建立 project

GOPATH 以外的地方建立一個 directory,並且在其中執行 go mod init

1
2
3
$ mkdir project
$ cd project
$ go mod init github.com/cjwind/project

會產生 go.mod 檔案,它會記錄 Go module 與使用的 Go 版本:

1
2
3
module github.com/cjwind/project

go 1.15

接下來在這個 directory 裡進行開發跟 build 就都一樣,重點是現在 source code 不用非得放在 GOPATH 裡啦~

套件管理

go get 安裝 package 後,會發現在 go.mod 多了一行 require [package] [version],就表示目前使用的 package 及其 version。

另外可能會出現 require [package] [version] // indirect,這表示是我們使用的 package 所需要的 package。

也可以用 go get [package]@[version] 來指定特定的 package version。

Ref

COPY

COPY 如果 source 是 directory,會 copy directory 的內容,但是 directory 本身不會 copy。

假設有個資料夾叫 css/,底下有兩個 file foo.cssbar.css

1
COPY ./css /workspace/

這樣在 container 裡會變成 /workspace/ 底下有 foo.cssbar.css,而不是 /workspace/css/ 底下有 foo.cssbar.css。想要是 /workspace/css/ 底下有兩個 file 得這樣寫:

1
COPY ./css /workspace/css

Ref:https://docs.docker.com/engine/reference/builder/#copy

使用 embedded struct 做 json 的 marshal 跟 unmarshal 時,json 欄位會省略 struct embedded 欄位的中間名,以比較簡潔的形式呈現。如果 struct 有寫出欄位名稱,json 欄位就會多那一層。

使用 embedded struct

1
2
3
4
5
6
7
8
9
10
11
type Serving struct {
Amount float64
Unit string
}

type Food struct {
Name string
Serving // embedded struct
NutritionInfo
Comment string
}

marshal 結果:

1
2
3
4
5
6
7
8
9
10
{
"Name":"Banana",
"Amount":100,
"Unit":"g",
"Calorie":0,
"Carb":0,
"Fat":0,
"Protein":0,
"Comment":""
}

不使用 embedded struct

1
2
3
4
5
6
type Food struct {
Name string
Serving Serving // not embedded struct
NutritionInfo
Comment string
}

marshal 結果:

1
2
3
4
5
6
7
8
9
10
11
12
13
{
"Name":"Banana",
"Serving":
{
"Amount":100,
"Unit":"g"
},
"Calorie":0,
"Carb":0,
"Fat":0,
"Protein":0,
"Comment":""
}

不用 embeded struct 就會有一層 Serving,用 embedded struct 就會省略 Serving 這層。

submodule 是在 git repos 中使用別的 repos 的方式之一。

git 的 submodule 是記錄一個指到別人 repo 某個 commit 的指標。對主 repo 來說,記錄的只是一個 submodule commit hash。

切到 submodule 的目錄時做 git 操作會是在操作另一個 repo。

加入 submodule

1
$ git submodule add <repo path>

clone 含有 submodule 的 repos

clone 含有 submodule 的 repos 後,submodule 的目錄會是空的,要做以下動作來初始化:

1
2
$ git submodule init
$ git submodule update

git submodule update 會讓 submodule 的內容回到記錄的 commit。

更新 submodule

submodule 的 repo 更新或者想用不同版本(commit)的 submodule 時,要做以下操作:

1
2
3
4
5
$ cd submodule_dir
$ git pull
$ cd ..
$ git a submodule_dir # 更新主 repo 記錄的 submodule commit hash
$ git ci

概念是把 submodule 的 repo 更新或者 checkout 到想要的 commit,再在主 repo 更新記錄的 submodule commit hash。

移除 submodule

1
2
$ git rm -rf submodule_dir
$ vim .git/config # 移掉 submodule 相關設定

.gitmodules

檔案 .gitmodules 會記錄有哪些 submodule。

任何檔案可以擁有任意數量的 init() function:

1
2
3
func init() {
// ...
}

init() 會在程式啟動時自動以宣告的順序執行,但不能被 call 或參考。

假設有以下兩個 go 檔案:

foo.go
1
2
3
4
5
6
7
package main

import "fmt"

func init() {
fmt.Println("foo.go first init")
}
main.go
1
2
3
4
5
6
7
8
9
10
11
12
13
14
15
package main

import "fmt"

func init() {
fmt.Println("main.go first init")
}

func init() {
fmt.Println("main.go second init")
}

func main() {

}

go run 以不同的順序指定 source file 會有不同結果:

1
2
3
4
5
6
7
8
9
10
11
12
13
14
15
$ go run foo.go main.go
foo.go first init
main.go first init
main.go second init

$ go run main.go foo.go
main.go first init
main.go second init
foo.go first init

# 不指定 file
$ go run .
foo.go first init
main.go first init
main.go second init

不指定 file 的話 go 會將 file 以其名稱排序。

如果嘗試直接 call init() 則會 compile error:

1
2
3
4
5
6
7
8
9
10
11
package main

import "fmt"

func init() {
fmt.Println("main.go first init")
}

func main() {
init() // compile error: undefined: init
}

要為一段 code 寫測試,首先要在測試中建立它所屬的 class 的 instance,接著為要修改的 method 寫測試。這章要解決的是「難以在測試中執行要測試的 method」的情境。為一個 method 寫測試可能會遇到的問題:

  • 無法在測試中 access 那個 method,例如它可能是 private 的或是有其他存取限制。
  • 很難建立所需參數,導致很難 call method,例如參數是一包 XML。
  • 要測試的 method 可能產生糟糕的 side effect,例如修改 DB、發射飛彈等等,所以無法在測試中執行它。
  • 需要透過該 method 使用的 object 進行 sense,才能知道這個 method 做了什麼事。

The Case of the Hidden Method

假設我們要修改的是一個 private method,想要測試它,該怎麼辦呢?

首先,能透過 public method 來測試它嗎?如果可以,就這麼幹吧~用 public method 去測試,就是按照程式中 private method 如何被使用的方式去測試它。如果有天要把 private method 改成 public,把它變成 public 的人應該寫一系列的測試說明這個 method 的用途以及 caller 該如何使用它。

這邊有提到一點 method 設計實作上的小概念:

雖然 general 的 method 對 caller 來說蠻有用的,但每個 method 的功能應該剛好可以滿足 caller 並且易於理解與修改。

有時候呢,我們就是想直接為 private method 寫測試(任性),可能是因為我們想用測試來知道如何使用 private method,或者用 public method 來測試它實在太難太痛苦啦~

例如一個擁有商業邏輯並且會 call third-party API 的 class 做的事情是:call API 取得一包 XML 資料,parse XML 得到商業邏輯需要的資料,再做商業邏輯上的計算或操作。我們想知道 parse XML 的 private method 是否正確,但它埋在整個流程裡,而用 public method 做整個的 call API、parsing、商業邏輯的測試難以只測試到 parse XML 的部份。

所以,想為 private method 寫測試時該怎麼辦呢?

如果需要測試一個 private method,就該把它設成 public。

看到書上這句話我蠻驚恐的,想著:「等等等,不是吧?就這樣直接把 private method 變成 public 好嗎?這不會在 class 上開出看起來突兀或者不知如何使用的 method 嗎?」

如果不方便將其設為 public,大多數情況下意味著我們的 class 做太多事了,應該進行調整。

喔~原來是這樣~這倒是真的~像上面那個例子,一個 class 既 call third-party API 又 parse XML 又做商業邏輯,太多事情了。

如果我們想測試一個 private method,首先看它是不是個適合在這個 class 當作 public 的 method?如果是,直接改成 public。否則看看是不是這個 class 做太多事了,有些事可以交由另一個 class 處理。例如我們把 parse XML 有關的 method 放到另一個 parser class,這些 method 到了新 class 會變成 public,原本的 class 就能 new 一個 parser 出來做事。

好的設計應當是可測試的,不具可測試性的設計是糟糕的。

如果我們遇到上面這樣的狀況,想拆解 class、將職責分開,卻沒有多少現成測試呢?假設我們想拆解這個包山包海的 class,但它本身卻沒有什麼測試,而 refactor 應當要有測試保護,雞生蛋蛋生雞的問題出現啦~

又或許,我們正在開發週期的後期,軟體已經接近 deploy,我們沒有多少時間去做拆解的 refactor,而且沒有測試又讓 refactor 的風險大幅提昇。儘管 refactor 可以改善程式結構、有好處,但需要考慮目前處於開發週期的哪個階段、時間多寡與風險高低,才能決定要不要 refactor 以及 refactor 到什麼程度。

時間不夠或風險太高的時,我們無法拆解 class。退而求其次,至少幫我們要修改的 private method 加上測試,讓這個 class 開始有測試保護也是好的。

想為 private method 加上測試,表示要能在測試中直接 call 到這個 method,要怎麼做呢?

又用到 Extract and Override 了~這招也太萬用…

假設我們有個與機票搜尋、訂購有關的 class:

1
2
3
4
5
6
7
8
9
10
11
12
13
14
15
16
17
class Flight {
public function search($searchParams) {
// call third party api and get response as xml
$searchResults = $this->parseSearchResponse($xml);
// other impl.
}

private function parseSearchResponse($xml) {
// impl.
}

public function booking($bookingParams) {
// impl.
}

// other methods
}

search() 裡先用 http client 向 third party API 送 request 並收 response,response 是一包 XML,我們想 parse 出其中需要的資料而 call parseSearchResponse()。因為 XML 相當複雜,我們希望能單獨確認 parsing 結果是否正確。

這個 class 除了 search、booking、parse 各種 XML 之外還會做許多事情,它的職責太多了,如果我們現在沒有時間去拆解它,卻想測試 parseSearchResponse() 的結果該怎麼做?

首先將 parseSearchResponse()private 變成 protected

1
2
3
4
5
6
7
8
9
10
11
12
class Flight {
public function search($searchParams) {
// call third party api and get response as xml
$searchResults = $this->parseSearchResponse($xml);
// other impl.
}

// 變成 protected
protected function parseSearchResponse($xml) {
// impl.
}
}

接著在測試中繼承它:

1
2
3
4
5
class FlightForTest extends Flight {
public function parseSearchResponse($xml) {
return parent::parseSearchResponse($xml);
}
}

這樣就能在測試 call 到 parseSearchResponse() 進行測試了:

1
2
3
4
5
6
7
8
class FlightTest extends TestCase {
public function testParseSearchResponse() {
$target = new FlightForTest();
$xml = 'blabla';
$ret = $target->parseSearchResponse($xml);
// assertions
}
}

這麼做雖然沒有立即改善 Flight 做太多事的問題,但至少幫修改的地方加上測試,確保目前的修改是正確的。並且為將來拆解 class 的 refactor 鋪路――因為加了些測試而減少之後 refactor 所需的 effort 跟時間,使之後 refactor 成為可能。

補充

在 Debian,先安裝:

1
$ sudo apt install mariadb-server

裝完做些跟安全有關的設定跟 root password:

1
$ sudo mysql_secure_installation